
My busiest sewing season has arrived! Preparing for summer. I don't sew much for the girls in winter, mainly because I am not a big fan of sewing on sleeves. So this past winter I just got away with a few leggings and re-made sweater dresses from my tops. One of the first summery dresses I made this year is one of the easiest ones too. This might be a good project for the first timers out there.

The best thing I like about a pillowcase dress is that you do not need very accurate measurements. The only most important measurement I took was for the length of the dress. This can be made as a top, a dress or a 3/4 dress/top. I went for the last option.
Here's the step-by-step. There are a lot of pictures and just as many steps. But fear not, every step, every stitch you make are simple ones...
First you decide how long you want the outfit to be. I wanted this to be sort of a tunic top which measured 14" from neck to the bottom hem of my 4 year old. Adding an inch and a half hem on the top and 1/2 on the bottom, I needed a total length of 16". Now irrespective of how long you want the outfit to be, keep the width at around 16" or so. (This dress will fit 3-5 year olds)
So, cut the fabric into 2 squares 16"x16".

Cut out the armholes from the top of your fabric to about 5" down.

Place the good sides of the fabric together and run a stitch along both the sides.
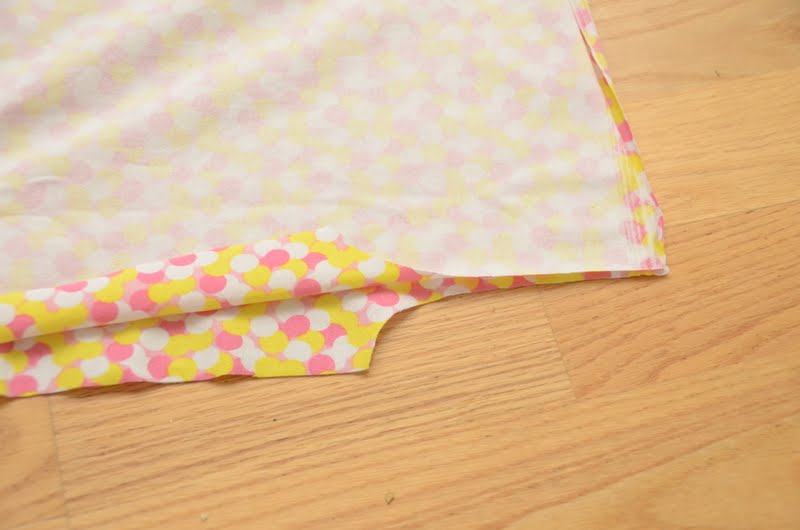

You end up with a sewn up 'sack' like this.


Now to hem in the arm hole, I like to make my own bias tape and take it in. Cut 2 strips of fabric along the bias grain of the fabric measuring 15"X3/4"

You can prepare the bias tape by folding it in half length wise and ironing it. You may also run a long stitch along the edge to hold the fold together. Now I have done this too many times to be arrogant/confident enough to just wing it. Place your bias tape on the right side of the fabric, and sew along the edge of the arm hole.


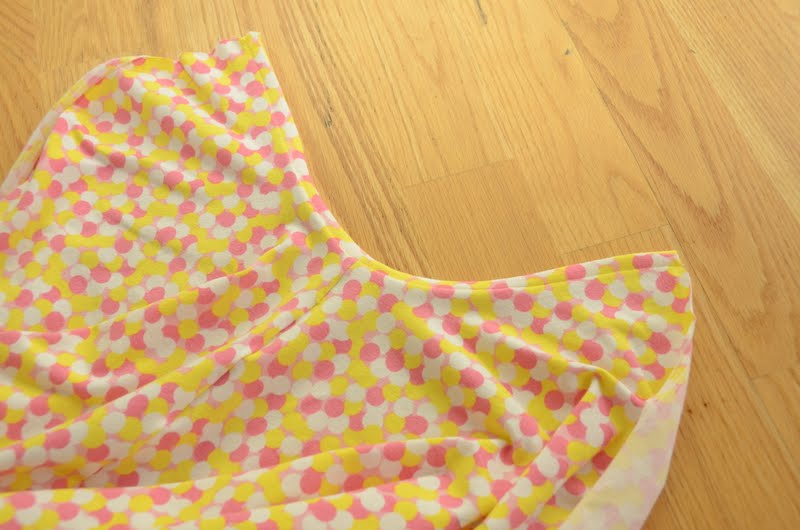
Now, flip the bias to the other side of the fabric and top stitch along its edge.


You end up with a neat little arm hole.

Now for the top hem. Fold in the top of the fabric at about 1.25" and iron it. Fold in just a little bit along the edge and iron it again. Now top stitch along the edge.

Note that you have a gap on the side. DO NOT sew it up. You need this to thread the ribbon.

Finish up the bottom hem line. Your outfit is almost done.
Now. Here's where you can apply variations to your outfit.
1. You can use one long ribbon thread it through both the front and the back and neatly knot it up on one side of the shoulder. Like this outfit below.

2. You can use 2 ribbons. Thread one through the front and one through the back and knot them up on either sides. Like this one.

Both the above methods are good for beginners. Now for the adventurous ones out there who want to sew a little bit more....here's method number 3.
You need two pieces of fabric 6"X3". (The ones in the picture are longer. I made it using this method for the first time...so after making a few mistakes...6"x3" is what worked best for me.)
And also two 4" strips of 1" elastic.

Make a tube out of the fabric by folding it on half length wise and stitch together on the edge of the wrong side.

Use a pencil to turn it inside out and iron flat with the joint right in the middle. This will be our shoulder strap.

Now, insert the elastic into the strap just about 1/8" and pleat the extra fabric around it and stitch them together.

Using a safety pin on the other end of the elastic, thread it through the opening on the neck hem.


Stop when the fabric/elastic joint just gets hidden inside and top stitch it.


Now add the other strap to the free end of elastic and stitch it like above.

Confusing? Just look at the picture below and this is what you should end up with...

Now, add the second elastic strip to the free end of shoulder strap. Thread the elastic through the back neckline and join it to the other shoulder strap. You will have to stitch the edge over here too, where fabric meets elastic.

Your (now-not-so-simple) pillow case dress is done. Pair it up with a legging from the tutorial here. (Link)
I felt there was something missing, so added a mock-tie element using fabric glue.

Now if only the weather would get warm enough for us to wear this outside....


No comments:
Post a Comment