T-shirt dress

We love re-purposing. What's more fun than making a whole new outfit from an old one?! Usually the honor goes to my old clothes that get converted to some form of the girls' outfits. But this time, we added a new element to one of Big Sister's t-shirts and made a t-shirt dress.


I found this long strip of fabric while rummaging through my scrap box. This a leftover piece from a dance costume I made a couple of years back. The dimension was perfect to be added on as a low skirt....so that's what we did.


Read on for my step-by-step on making this t-shirt dress....


Wedge Panel Flared Skirt

OK. Maybe my search phrases are bad...but I just couldn't find what this skirt is called. I modeled it after one of my own Gap skirts. So I am just naming it the Wedge Panel Flared Skirt...because that's what it is!


The type of material you make this with, changes the look of the skirt. I used a thick khaki denim and that made the skirt flare out a little stiff. If you use a lighter material, the flare will be more subdued...

Want to make one? Read on for my step-by-step including pattern making.


Simple Shirred Dress

Now that spring is here (here in Colorado, we had a teaser spring and then 2 days of snow! in MAY!!!), time to get the sundresses out. And finally step out in what you wear at home and not add on all those layers! So time to make some dresses.

I am starting this season with a very simple sundress. Remember when I said I am shir-crazy now....I meant it. Here is the how-to for a simple shirred dress.


If you need help shirring, refer to one of the tutorials below, depending on the type of machine you have.

Read on for the step-by-step on the dress making...

Finishing Hems - Using folds and Bias Tapes

When a sewing project is almost done, all that's left is to finish the hems. The bottom hem, neckline and armholes (if sleeveless). There are many methods to go about this...based on the fabric and what you are comfortable with. Here are a few of my preferred methods for finishing hemlines...


Click on any of the above methods to skip to that section or read on to see them all...


Understanding bias grain and Making your own bias tape

You have probably seen the ribbon like strips of fabric right by the threads and zippers at your local fabric store and wondered what it is used for....Or you probably buy those ribbon like strips of fabric and know how to use them. They come in fixed widths, different folds, (which I will try to explain later here), and different colors...mostly solid. They have numerous uses (which I will again try and explain in a different post) and is kind of a must have for any level of sewing.

I used to buy these until I got bored of the solid color choices available and decided to use print fabric to make my own bias tape. There are again many ways to make them. This is one I have adapted and find it the easiest way to make bias tape.


Want to know more about bias tape...and make your own? Read on for my method of making bias tape...

Shirring made simple - 2 types of machines

Have you noticed on any garments the rows and rows of gathered fabric? The whole thing stretches and just when you wonder why and look on the inside of the garment, you don't see the usual thread, but instead a thick elastic thread! Well, that's shirred fabric. Elastic shirred to be specific. (You can also gather fabric using normal thread but that won't stretch...and that's called thread shirring)

The concept is pretty simple: You sew straight stitches with your normal thread as the top thread and elastic thread in the bobbin. Once you adjust the bobbin tension and stitch length accordingly, when you make a straight stitch the elastic thread on the bottom stretches but reverts back to its original length once you finish, thereby creating a gathering. Creating more such gathered rows produces a beautiful effect and enables the garment to fit more snugly, contouring to body shapes and curves.


Would you like to try shirring? Now, depending on the machine you have shirring can be super-duper simple or just super simple. The basic difference in the simpleness depends on whether you have a machine that has a metal case for the bobbin or if you have one where you just drop-in the bobbin under the presser foot. Read on for shirring methods using both types of machines...

Easy Zipper Pouch with Lining: Tutorial

We did a LOT of travelling the last couple of months. And this was my first time spending that much time away from home with the 2 girls. As tiring as a  28 hr door-to-door travel via 3 continents was, we got back unscathed, full of wonderful memories, and now sadly back to real life, missing family back home in India. After nearly 2 months of being pampered, we are finally getting some semblance of our routine back. So time for me to get back on the blogging horse!

I made these easy sew zipper pouches just before we left and we just couldn't have enough of these. They are multipurpose and made from leftover fabric and washable. And if you have ever been intimidated at the thought of sewing in a zipper, this is the best place to start.


DIY Felt Witch Hat

Big Sister has decided for the Little One to be a witch this Halloween. So, I made this skirt (link here) for the little witch. Now, every witch needs a hat, doesn't she? My quest for making a hat got me to blogs where I could download or buy patterns that would fit a particular age group. This would not suit me because Little One has a really small head and an age appropriate size would be too big for her. And I did not find a pattern for a smaller size.

So, I started drafting my own pattern. And it turned out to be a perfect fit.


Want to draft a custom pattern for a witch's hat? Beware, some math involved! I had to refresh on my basic geometry!

No-sew super poofy tulle skirt

It's only September and I have already started working on the kids' Halloween costumes! My motto is 'make use of nap time'. This year Big Sister decided she wants to be Snow White and Little One, a witch. The Snow White costume is still in fabric status, but the witch is almost done. I made this very easy (but slightly messy) no-sew tutu skirt for the witch.


This skirt is super easy to make because there is just one little stitch that you are going to make. The fabric is going to be tied to the waist band. It might get a little messy because you will be handling about 100 strips of fabric. We love this skirt because it is super poofy. Thanks to all the layers of fabric, the tulle skirt is not see through.


After making this black and brown witch's skirt, Big Sister has put in an order for a rainbow colored tutu. And she is going to help me make it. It's that easy! Want to make one?

Easy Girls' Elastic Waist Skirt - Tutorial

I have been absolutely project-less the last couple of weeks here at Mommyland! And it has been a while since I fired up the sewing machine as well. So here's a sewing project...

While sorting the kids' clothes the other day, I realized there were just 3 or 4 outfits that I had made FOR the Little One. Ofcourse she has a bunch of MommyMade stuff, but those are all hand me downs from Big Sister. So I decided to try and balance the scale just a little bit with this easy elastic waist skirt.


This is a great sewing project for beginners. This one took me about 30 minutes (with pauses in between to take pictures!). I learned to make this very simple skirt from my aunt when I was about 12. She was kind enough to let me experiment with her machine and I made my first very own skirt!

Want to make one for your little one...or yourself? Read on for my step-by-step...


Attack on the clearance rack!

My sewing, like my online activity, takes place in spurts. I am overly active for 2 days and go on sleep mode for the rest of the week. The result of one such spurt in activity is a super recycled summer wardrobe for the kiddos.

This time, I did not go closet shopping and pick out my old T-shirt. Instead a while back I had attacked, literally, the clearance rack at my local Walmart, Target and Forever 21. Result: End of Season knit T-shirts for $2. And these are lovely soft knits that is pretty good summer fabric and will not sweat you out.

You can do these with your old t-shirts as well. Here are a few ideas for recycling adult's t-shirts into kids dresses...

So, the fabric from these 2 t-shirts became 3 mini dresses, and the sleeves became scarves!


Read on for more conversion projects...

Fabric Flower - 3

I am back! After a 2 week long hiatus! A child who is not feeling very well, can siphon out pretty much all of your 'me' time. Adding to her already volatile mood, Little One was stung by a bumble bee! But all is well now. Naps are regular...so my posts will be regular as well...

This has been a long pending post. I made a bunch of these flowers for Little One's first birthday. Just made a few more yellow ones for spring and managed to click some step-by-step pictures.

Want to make a few of these?


You don't need much fabric to make them. Again this is a great scrap fabric project. Here's the step-by-step...


Control-Frayed Denim

Ever wanted to have that frayed look on your denim when you make jeans into capris?


 End up with uneven frays or fabric that never stops fraying?


And not a fan of the rolled up jean look? (I never get this one right!)


 Here's how you can have controlled frays on your denim...

Simple drawstring backpack tutorial

A drawstring bag was one of the first things I made using my mother's vintage Singer (that used to belong to my grandmother!) and fabric scraps. I think I made a little coin purse with it. Drawstring bags are super simple to sew and make for good gift bags with a personal touch. Or in a smaller size, a good coin purse.

This past week, I made a drawstring backpack for Big Sister. This is a very versatile lightweight bag. You can make this with a wide variety of fabrics, but I think thick cottons, denim or canvas works best. (Although, you cannot wash a canvas bag...)


Here's my step-by-step to make a simple drawstring backpack...

Braided hair band from fabric scraps: tutorial

I mention a LOT about fabric scraps....just how much scrap am I talking about? Take a look at this project and you'll see what beautiful accessories you can make with just a little cloth...

Braided fabric hair band.


Here's the step-by-step.


Reuse-Remake Idea: Cart cover from play mat

I do love fabric shopping. Sometimes a little too much. But there is a whole different satisfaction I get from reusing what I have already and remaking it into something new and useful. Making dresses for the little ones from my old tops is definitely a favorite in the reuse-remake category. Right now, I am using the babies' cotton blankets to make a zip up sleeping bag for Little One, who has a habit of climbing/jumping out of her crib in the night time. It's fun when you go 'closet shopping' for fabric...

One of my first projects to reuse-remake was convert the baby gym/play mat into a shopping cart cover. I don't have a tutorial for what exactly was done, but thought I will pass along the idea, as it has proved to be pretty useful and functional. About a half an hour's work has saved me $20 and protection from countless germs on the shopping carts.

I'll admit....the idea was borrowed one. When I was shopping for a cart cover for the kids, I saw this Infantino 2-in-1 cart cover and play mat. That got me thinking....now I already have a play mat, how difficult is it going to be to make a cart cover out of it. And I did not need a play mat any more....

So this became.....


This....


Easy girls' dress tutorial: Pillowcase Dress


My busiest sewing season has arrived! Preparing for summer. I don't sew much for the girls in winter, mainly because I am not a big fan of sewing on sleeves. So this past winter I just got away with a few leggings and re-made sweater dresses from my tops. One of the first summery dresses I made this year is one of the easiest ones too. This might be a good project for the first timers out there.


The best thing I like about a pillowcase dress is that you do not need very accurate measurements. The only most important measurement I took was for  the length of the dress. This can be made as a top, a dress or a 3/4 dress/top. I went for the last option.

Here's the step-by-step. There are a lot of pictures and just as many steps. But fear not, every step, every stitch you make are simple ones...

Party Favor Ideas:Pen or Crayon holder for little notebooks

We made these for Big Sister's birthday party favor bag (link). While I stitched the loops, Sister inserted the notebooks and the crayons. It was a fun project together...


Here's the DIY step-by-step...


Fabric Flowers - 2

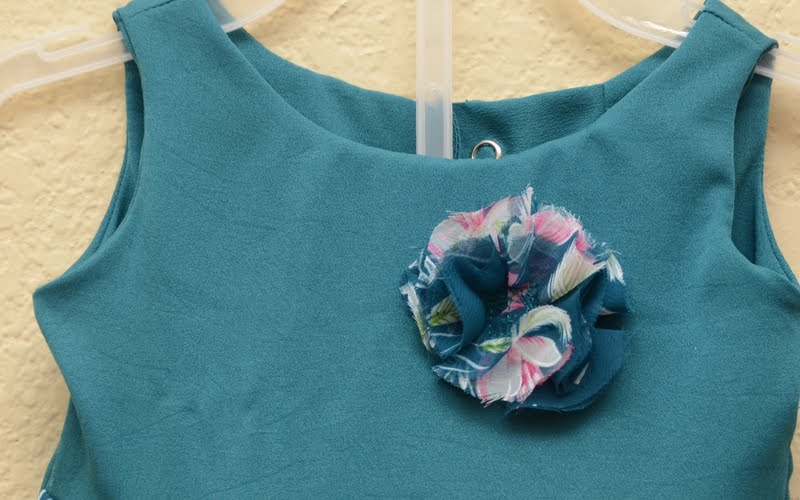
By now you know. I am fabric junkie. Scraps hoarder. What started off as a small JoAnn's bag filled with fabric scraps, now fills up two 6 quart Sterlite boxes. Flowers are a great accent to make with leftover fabrics. You can use a contrast or design fabric to add accents to dress, or make them with random fabric to add to hair clips, band, etc.

Last time, we saw a very simple singed flower tutorial. (Link). Here's another easy to do tutorial.

I saw these flowers on almost all of Baby Gap and Gap Kid girls' outfits a year or so ago. These are very simple to make and look particularly fluffy when you layer them up or use chiffon or georgettes.


Sewing Pockets

Pockets are an essentially useful addition I feel is so lacking in Indian outfits. I feel the need for a pocket most, while carrying one toddler and dragging the other one and handbag is neatly zipped up and I just need a place to tuck away the car keys other than holding them between my teeth...

So now, almost all my kurtas and salwar tops have pockets sewn in. And these are almost invisible and don't affect the form of the outfit in any way.


Here's a step by step on how you can do this too. Takes about 20 minutes.


Related Posts Plugin for WordPress, Blogger...